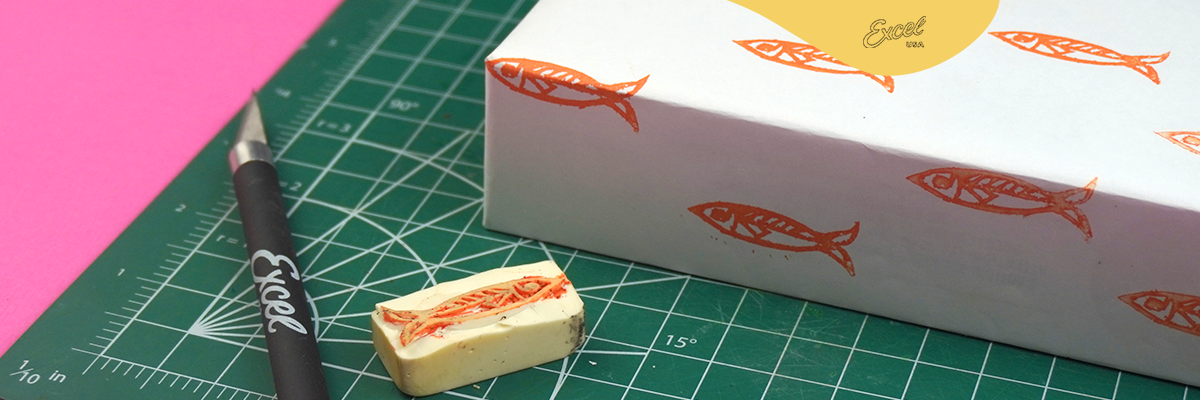
How to Make Rubber Stamps for Beginners
Making your own custom rubber stamps is one of the most rewarding DIY projects for crafters, artists, and small business owners. Whether you want to create unique stationery, add a personal touch to packaging, or explore lino cut stamp art, learning how to carve stamps opens up endless creative possibilities.
In this guide, we’ll cover everything beginners need to know about DIY rubber stamp carving—from choosing the right materials and tools to step-by-step instructions, plus inspiring ideas to take your projects to the next level.
Why Make Your Own Rubber Stamps?
Creating rubber stamps by hand allows you to:
- Personalize your artwork, journals, and scrapbooks.
- Create custom branding for small businesses and packaging.
- Experiment with lino art stamp designs for fine art or printmaking.
- Enjoy a relaxing, meditative craft that sharpens hand skills.
Unlike store-bought stamps, DIY stamps are one-of-a-kind and reflect your unique creative style.
How to Make Rubber Stamps for Beginners
If you’re just starting, don’t worry—rubber stamp carving is simple once you have the right materials.
Step 1: Choose Your Stamp Material. Beginners usually start with:
- Soft rubber carving blocks – easy to cut and forgiving for new users.
- Linoleum blocks (lino) – a firmer surface, often used in fine art printmaking.
Step 2: Gather the Right Tools. You’ll need:
- Precision knives like the Excel Blades Carving Knife for detailed cuts.
- Carving gouges (V- and U-shaped) for larger areas.
- Cutting mat to protect your surface.
- Ink pads or block printing ink for stamping.
Step 3: Sketch Your Design. Draw directly onto the rubber block with pencil, or transfer your design using tracing paper. Remember that the stamp will print in reverse.
Step 4: Carve the Stamp
- Use a precision knife to outline the design.
- Remove the negative space with carving gouges.
- Test print often to refine details.
Step 5: Stamp and Enjoy. Ink your new stamp and press it onto paper, fabric, or packaging.

How to Make Rubber Stamps for Beginners Lino Art
For those drawn to lino cut stamp art, the process is similar but requires firmer tools. Linoleum is harder than rubber, so you’ll want sharp carving tools like the Excel Blades #11 Double Honed Blade.
Lino stamps are perfect for:
- Bold graphic patterns.
- Handmade greeting cards.
- Decorative art prints.
Lino Cut Stamp Ideas
If you’re not sure what to carve, here are beginner-friendly lino cut stamp ideas:
- Geometric patterns (triangles, circles, lines).
- Botanical designs (leaves, flowers, vines).
- Simple animals (birds, fish, butterflies).
- Seasonal motifs (snowflakes, pumpkins, stars).
Start simple and increase detail as your carving confidence grows.
Rubber Stamp Carving Tools
The quality of your tools makes a big difference in how enjoyable and precise your carving experience is. Some essential rubber stamp carving tools include:
- Precision Hobby Knives: Excel Blades Craft Knives – great for cutting fine details in rubber and lino.
- Carving Gouges & Routers: V- and U-shaped for scooping out material.
- Carving Knife: Ideal for trimming blocks to size.
- Self-Healing Cutting Mat: Keeps surfaces safe and blades sharp longer.
Using sharp tools ensures clean cuts and prevents tearing, which is especially important for intricate designs.
Custom Rubber Stamps for Small Business
One of the most popular uses for DIY stamps is branding and packaging. Small businesses often create:
- Logo stamps for kraft packaging.
- Thank-you stamps for cards and receipts.
- Pattern stamps for wrapping paper.
Instead of ordering mass-produced stamps, a handmade one adds a personal touch that customers remember.

Stamp Making Kit for Beginners
If you’re not sure where to start, a stamp making kit is a great investment. Kits typically include:
- Rubber carving blocks.
- A basic hobby knife with interchangeable blades.
- A set of carving gouges.
- Ink pad for testing.
Pair your kit with high-quality blades from Excel Blades to make carving smoother and more enjoyable.
DIY Rubber Stamp Tips and Tricks
- Always cut away from your hands to prevent accidents.
- Test your stamp often on scrap paper to see how the design prints.
- Use a magnifying lamp for precision carving.
- Keep blades sharp—replace them often with Excel Blades Replacement Blades to avoid jagged cuts.
For additional safety tips on blades, check out our video on How to Change a Hobby Knife Blade.
Inspiring Uses for DIY Rubber Stamps
- Scrapbooking: Add custom borders or decorative motifs.
- Gift wrapping: Create personalized wrapping paper.
- Stationery: Design your own cards and envelopes.
- Fabric stamping: Print patterns onto tote bags or tea towels.
DIY rubber stamps are versatile across art, craft, and even small-scale commercial projects.
Final Thoughts
Learning how to make rubber stamps for beginners is a rewarding, creative process that combines artistry with craftsmanship. Whether you’re interested in custom rubber stamps for branding, lino art stamp projects, or simply want to explore a new hobby, the right tools make all the difference.
Excel Blades offers a wide range of precision knives, carving tools, and replacement blades designed for artists, crafters, and hobbyists. Explore our Stamp Carving Tools Collection to get started today.
For more inspiration, check out our related guides:
- Best Precision Tools for Jewelry Making
- Best Wood Carving Tools
With the right tools and some practice, you’ll soon be creating beautiful, professional-quality stamps that bring your creative ideas to life.
Watch Now: How to Use Carving Tools for Linoleum Stamp Carving