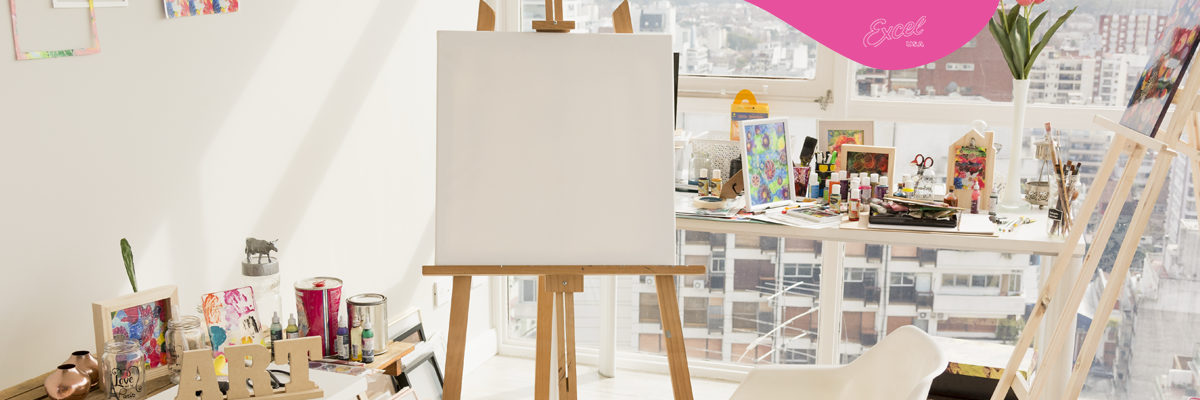
The Ultimate Craft Room Setup Guide: Organize, Decorate & Maximize Your Creative Space
Creating a well-designed craft room is like building a sanctuary for your creativity. Whether you're a weekend scrapbooker, full-time jewelry maker, or DIY hobbyist, a dedicated and well-organized space can dramatically improve your productivity, comfort, and inspiration.
This comprehensive guide will walk you through how to set up the perfect craft room—no matter your space or skill level. From choosing the right tools and storage systems to maximizing lighting and ergonomic design, we cover every angle to help you build your dream creative workspace.
Why a Well-Organized Craft Room Matters
Boost Productivity. An organized and clutter-free space lets you focus on your craft instead of constantly looking for tools or supplies.
Inspire Creativity. A beautiful and functional space fuels ideas, helps reduce mental clutter, and keeps you motivated.
Improve Safety & Efficiency. Proper storage for blades, scissors, adhesives, and heat tools reduces accidents and wear on your tools.
Step 1: Assess Your Space
Before moving furniture or buying containers, take a moment to evaluate your available space.
- Is it a dedicated room, a shared home office, or a corner of the kitchen?
- How much natural light is available?
- Is there enough electrical access?
Zoning Your Space
Create functional zones:
- Work Zone: Table or desk for crafting, cutting, assembling
- Storage Zone: Cabinets, carts, or drawers for supplies
- Display Zone: Finished projects, inspiration boards
- Packing Zone (for sellers): Space for boxing, labeling, and shipping
Step 2: Choose the Right Craft Table & Seating
Craft Table Essentials
- Sturdy surface: Look for a table that can support cutting and heavy materials
- Adjustable height: Prevents back and neck strain
- Easy-to-clean surface: Essential for messy projects (paint, glue, clay)
Ergonomic Chair. Comfort is critical for long crafting sessions. Look for an adjustable chair with lumbar support.
See our Ergonomic Craft Knives designed for all-day comfort

Step 3: Storage Solutions for Every Crafter
Modular Storage. Stackable drawers and rolling carts allow you to customize your space as your needs evolve.
Clear Containers. Let you see what’s inside at a glance—perfect for thread, beads, or cutting blades.
Pegboards. Mount on the wall to hang scissors, rulers, knives, or small bins.
Magnetic Strips. Ideal for holding metal tools like precision blades or tweezers.
Vertical Storage. Use the walls! Hanging baskets, wall-mounted shelves, and over-the-door organizers maximize space.
Step 4: Lighting & Visibility
Natural Light. If possible, set your desk near a window. Natural light reduces eye strain and improves color accuracy.
Task Lighting. Use an adjustable LED desk lamp with multiple brightness settings. A daylight-spectrum bulb is ideal.
Accent Lighting. Use string lights or color-changing LED strips to personalize your space and enhance the mood.
Step 5: Decorating Your Craft Room
Color Psychology. Use calming colors like soft blues and greens or energizing tones like orange and yellow based on your style.
Inspiration Board. Add a cork board or magnetic panel where you can pin swatches, designs, and photos.
Display Your Work. Frame your favorite pieces or create shelving for showcasing models, cards, or miniatures.
Personal Touches. Add plants, scented candles, or a speaker for music to create a space you want to be in.
Get inspired by our community's craft setups on Instagram
Step 6: Essential Tools for Any Craft Room
1. Precision Knives. From papercraft to vinyl to model building, a reliable craft knife is a must-have.
- Light Duty Craft Knife: Ideal for intricate cuts
- K26 Fit Grip Knife: Designed for long sessions
2. Cutting Mats. Protect your surfaces and prolong blade life with a self-healing cutting mat.
3. Tweezers and Scissors. For picking, weeding, trimming, and placing small parts.
4. Metal Rulers & Squares. Essential for measuring, scoring, and creating straight lines.
5. Sanding Tools, Needle Files, and Drills. Perfect for 3D models, woodwork, and jewelry-making setups.
Step 7: Organization Tips for Long-Term Success
- Label Everything: Use printed or handwritten labels for every drawer and bin.
- Rotate Projects: Keep current projects accessible and archive completed ones.
- Tidy as You Go: Finish each session with a quick 5-minute cleanup.
- Seasonal Clean-Outs: Sort through unused items quarterly and donate extras.
You May Also Watch: How To Make A Cardboard Window Valance
Small Space Craft Room Ideas
- Use fold-down tables or Murphy desks
- Wall-mounted shelves above your desk
- Rolling carts that double as side tables
- Corner shelving units
Explore Hobby Kits perfect for compact setups
Bonus: Craft Room Setup Checklist (Downloadable)
Keep this printable checklist handy as you plan your space:

Final Thoughts: Build Your Creative Sanctuary
A well-set-up craft room is more than just an efficient workspace—it’s your sanctuary. With the right organization, lighting, tools, and inspiration, your space can spark more ideas and elevate your craft.
Whether you're in a cozy corner or have an entire studio, the principles of zoning, lighting, and functional storage apply. Invest in quality tools, stay organized, and most importantly—make it yours.