How to Use a Mitre Box
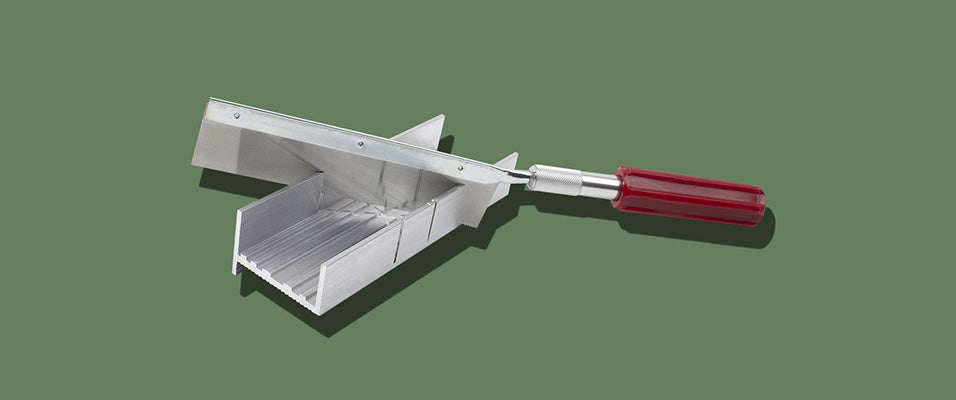
A mitre box is a wonderful tool for DIYers, craftsmen and woodworkers alike. They are a hand-powered tool that provides precision with power and works great for a variety of projects. This product is used in conjunction with a pull saw to hand cut pieces of wood, aluminium, plastics and more. You can think of it as a cutting mat for DIYers! It protects your workspace, all while offering preferred cutting angles.
This is quite a traditional tool, simple in construction but a must-have for anyone who prefers hand tools over power tools. A mitre box (or miter box) is a box made out of metal or aluminum that is constructed with slots at 90° and 45° to help guide the pull saw used to make the cut. Oftentimes, a mitre box comes within a set, which also includes the saw blade. Excel Blades offers mitre boxes and mitre box sets, as well as individual saw blades with a variety of teeth. The mitre boxes themselves are traditionally U-shaped and made of aluminum or plastic. In the past, mitre boxes were made with wood.
You may be wondering — What types of projects require a mitre box? If you are working on decorative trim, such as shelf edges, cabinet trim or wood framing, this is a must-have tool. The best way to become a pro at using your mitre box is by practicing. A great beginner’s project is a wooden picture frame. This project is fun, rewarding and you get to use the angle cuts on your mitre box! In just a few hours, you get the chance to make something that will last the rest of your life!

Start by collecting the wood of your choice. There are so many options on the market. The most common are basswood, ramin and poplar. Of course, some species are better than others when selecting your finish, so you want to keep in mind what your end style is. If you go to your neighborhood wood or craft stores, they will have prefab stocks of wood available for purchase. There are also tons of molding styles available as well. You can grab your favorite kind for the purpose of this project.
You want to start with putting your mitre box on the edge of a table. If you so choose, you can use a clamp to secure the edge to the table, but it is not required. Clamps tend to make things a bit easier and help stop the piece of wood from moving around, especially if it is on the smaller size. Some mitre boxes come with pre-made holes in them. You can put pegs in these holes in order to stop the movement. We prefer to always use a clamp when starting a new project. Better safe than sorry!
Next, grab your piece of wood and mark off with a pencil exactly where you would like to cut. Always remember to measure twice and cut once to ensure you are cutting at the proper measurement. For picture frames, this should be at the 45-degree angle on box ends. Remember, the two points on the pieces of wood must meet during assembly. Make sure they have opposing tips. Place your piece of wood within the mitre box. At this point, you can secure the piece of wood within the mitre box. Use your left hand to hold the wooden piece and your right hand should have your pull saw. If you are left-handed, you can hold the wood with your right hand and have the pull saw in your left hand.
Draw your saw back and forth a few times. The first few times may be a little difficult. Once you get into the groove of things, it should be no trouble at all. Always ensure that the hand holding the wood is at a safe distance from the saw. We suggest at least three inches away. Pro tip: Make sure you do not put too much pressure on it. The saw should be doing the work for you. After you cut the angles on all four pieces (eight sides total), you can use a damp cloth to wipe down your workspace. This will make it easier to glue. If you so choose, you can stain or paint your pieces of wood, or you can leave it natural.

Finally, as you finish all four pieces, use wood glue to attach each piece together, finalizing your wooden frame! It is very important to make sure all of the angles meet correctly to make a perfect square or rectangular frame. This is why the angles that come pre-cut into the mitre boxes are so important. This simple project is the perfect practice for using your mitre box and pull saw, all while leaving you with a lifetime souvenir. These will make awesome gifts or can hang perfectly in your own home.