


How to Carve a Pumpkin
A longtime favorite tradition this time of year is carving Jack-o’-Lanterns. The origins go back to the 1800s when Irish families immigrated to the United States and brought their custom of turning turnips into lanterns by hollowing them out to scare off a folk figure called “Stingy Jack.” The local pumpkins were perfect!
When choosing a pumpkin, consider how and where it will be displayed. Larger pumpkins are best for front door arrangements or around the fireplace. Smaller pumpkins are perfect for table centerpieces.
The shape of the pumpkins should be considered when designing your display. Think about how many pumpkins will be used in the design. Will they be in a row, staggered or in a random country-inspired stack.
Lastly, and most importantly, the bottom should be flat so that the pumpkin sits upright on display and when carving.
To clean your pumpkin, use soap and warm water and then dry with a towel.
Cut a circle in the top of the pumpkin using the K6 and No. 27 Saw Blade. Remove the top and hollow out the gourd. Use the No. 26 Blade to cut the pumpkin seeds and guts off for a clean “lid.”

Chef’s Tip: For a seasonal treat, after removing the seeds, rinse and dry them and then toast with olive oil and a dash of salt.
Besides the pumpkins, you’ll also need the following materials:
- K6 Heavy-Duty Knife
- K7 Carving Knife
- Large Pounce Wheel
- No. 27 Saw Blade
- No. 26 Whittling Blade
- Carving Routers
- Carving Gouges
- Tape
- Pencil
- Paper or Stencil

Carving routers and carving gouges add a broad variety of options that can be incorporated in pumpkin carving such as swirls, pinstripes or polka dots.
A polka dot design is the simplest. Start with lightly drawing the dots with a pencil on the pumpkin surface. Select your tool and cut, following the pencil line. For larger dots, use the K7 Carving Knife and No. 27 Saw Blade. For the smaller dots, use the Small “V” Router.

A pinstripe design takes a bit more skill since the lines should be straight for the best effect. Taller, vertically oval-shaped pumpkins are also more suited for this design.
Pencil in the lines, tapering them to a point at the top and bottom of the pumpkin. Follow the natural shape lines of the pumpkin.
Using the saw blade, follow each pencil line from top to bottom, slowly cutting each pinstripe. Beginner’s Tip: Start with wider spaces in between each pinstripe.
An alternative version of this design is a surface motif that does not go through to the inside, made by using carving gouges.

With either the large “U” Chisel or the small “U” Chisel, carve off the pumpkin surface by following the pencil line drawn earlier. For a shallow motif, go over the groove a few times and try to remove an even amount throughout. For a deeper motif, go over the line several more times. A light inside a hollowed out pumpkin with deep grooves that do not completely puncture to the interior has a gentle, softer glow than a traditional pumpkin carving.

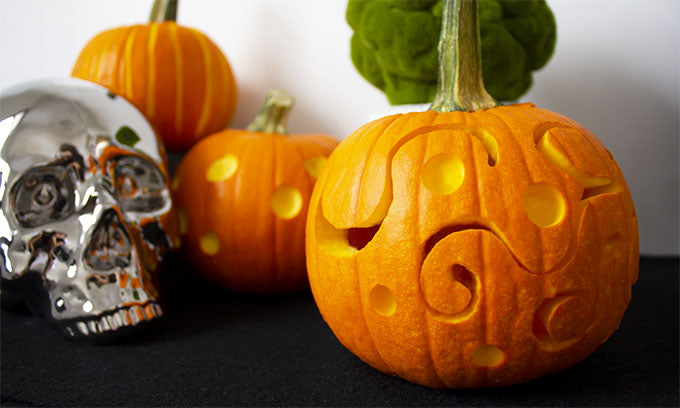
A swirl design can be either simple or complex. Smaller swirls are harder to cut than larger swirls. A beginner should start with a larger swirl design. To start, either draw the motif freehand directly on the pumpkin with a pencil or trace the pattern onto the surface with a pounce wheel.
Use the routers to cut the swirls out. To refine the cuts, use slow, deliberate strokes to smooth out the edges and perfect the details.
For more conventional Jack-o’-Lantern designs, draw or print the Jack face and trace onto the surface of the gourd with the pounce wheel. Alternatively, a store-bought stencil can also be used and traced with pencil or pounce wheel, depending on the stencil type.
Cut the larger opening like the eyes and smile with the whittling blade and use the carving gouges and chisels to refine the cuts, smooth the lines and add the small details.
Even though some of us wish for Halloween to last all year long, it’s quickly here and then “poof!” — it disappears to make room for Thanksgiving and the winter holidays. So enjoy this time, invite the family over, serve warm cider and tell silly ghost stories while carving this year’s Jack-o’-Lanterns.
Visit Excel Blades now to shop for the perfect stainless steel blades to get your Halloween Pumpkins started.
Buy Stainless Steel BladesStill unsure how to start your pumpkin carving design? Watch our helpful tutorial below!