


Cookie Decorating for Beginners — Everything You Need to Know
With Thanksgiving, Hanukkah and Christmas all around the corner, it’s baking season for many of us, not just the professional cookie bakers. And few things get us in the celebratory holiday spirit like holiday songs, family and friends, a messy kitchen and the aroma of freshly baked cookies.
We compiled a handy list of decorating techniques to get you started with this new hobby. Enjoy!
Cookie Icing
You can get this ready to use right off the supermarket shelf, sometimes packaged in a container with a ready-to-use tip. Cookie icing is similar to royal icing but it does not harden to a solid, so the cookies shouldn’t be stacked. It’s great to use at home and to practice piping with.
Dipped Cookies
One of the simplest cookie decorating techniques is to dip baked and cooled cookies in melted chocolate. Variations include dipping half in chocolate and sprinkling crushed almonds onto the layers of chocolate before it sets. Or try dipping half in white chocolate and the other half in strawberry flavored pink chocolate.

Edible Pearls
Add a little old Hollywood glamour with edible pearls to decorate your cookies. They’re made up of sugar and are available in many colors. For precise positioning, use hollow point tweezers.
Shop All Stainless Steel Tweezers
Fondant
Not just for cakes, decorating cookies with fondant is customizable and can be quick. Ready to eat fondant is available for purchase in many colors or can be made custom with added food dye. For a simple fondant cookie, decorate the flat surface with edible color markers or paints. Fondant can be layered, shaped and molded, so elaborate three-dimensional cookies are only limited to the imagination. Using a craft knife with a stainless steel blade, cut designs from a sheet of fondant or mold into shape with burnishers.
For a quilting motif, use a pounce or tracing wheel to create perforations in the flat fondant and add an edible pearl on the intersections.
Millefiori Cookies
Borrowing this technique from Polymer Clay and Glass Blowing artists, putting together dough colored with food dye can create fun effects.
Divide cookie dough into equal parts and use food coloring in at least two colors. Dye the cookie dough by kneading it in. Chill the dough in the freezer. Once hardened, arrange the dough in a pattern of your choice and form into cookie shapes ready to bake. Be sure to follow the baking instructions for your dough, as some recipes call for ½” slices, whereas others suggest a ¼” slice for baking.
Piping
Professionals and TikTokers make this technique look easy, and for them, it is due to all the time dedicated to practice and planning. When piping designs onto a cookie, consider a few important things before starting;
- What do you want the cookie to look like? Planning a design is crucial.
- Tip size, decorating tip size are standardized with No.1 Round being very small and a No.12 is large. Many shapes are also available. Think about which size and shape tip to use where in your design when planning.
- What will you be piping with? Royal icing is commonly used for cookies, as is frosting or buttercream.
- Which surface will you be piping on? Did you cover your cookie with fondant, buttercream, royal icing or will you pipe directly on the surface of the cookie? Consider all these when selecting the cookie piping mixture.
Royal Icing Decoration
This may be the technique that allows for maximum creativity when decorating cookies. Quality cookie decorating tools, a steady hand and practice are key. For cookie decorating, the royal icing is made in two consistencies — one for outlining (piping) and one for flooding (filling in). The consistency of the flooding mixture has more water so that it spreads easier and hardens slower so that it can be manipulated if needed.
Get Must-Have Cookie Decorating Tools
A handy tool to have on hand when using royal icing is a stainless steel awl. This tool helps to manipulate the icing into areas where it did not flood completely.
Because this is such a popular decorating method, there are thousands of instructional videos available to watch and learn from. Speaking from experience, start with easy, smaller shapes and practice outlining the cookie and then flooding it with a single color. Once you have done that a few times, move on to two- or three-color cookies.

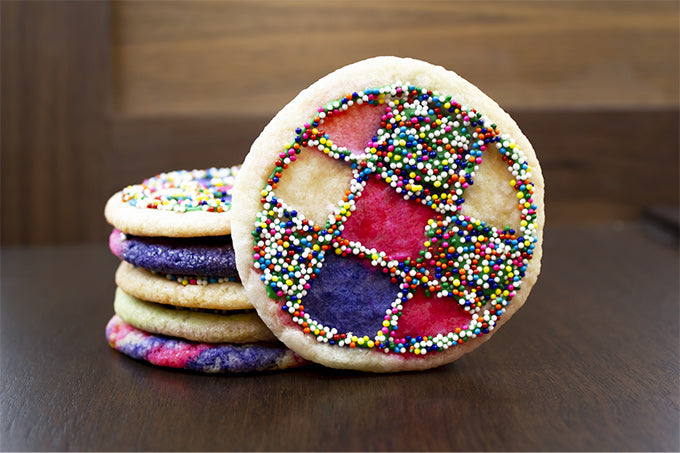
Sprinkles
Available in many colors and several shapes and even themed mixes like Unicorn Sprinkles or Hanukkah Sprinkle Medley, decorating cookies is fun, quick, forgiving and very effective. The cookies look great!
One method is to cover the entire surface of the cookie with frosting, buttercream or royal icing and topping off with sprinkles. Use as little or as many sprinkles as you like.
Alternatively, using royal icing on a cool cookie, pipe a design of your choice. Do this in sections if it’s very elaborate. Place the cookie in a shallow bowl with a flat bottom — a cooking pan will do the trick — and generously pour the sprinkles over the cookie for maximum sprinkle coverage. Remove the cookie and then transfer the excess sprinkles back into a smaller container so they can be used in the next step. Repeat until the cookie design is done and covered.

Stencils
Cookie stencils are a great way to decorate cookies when used with royal icing, edible sprays or airbrushing. This takes a little trial and error, but once mastered, it’s a very quick way to decorate cookies.
Transfers
This is a term used for decorations made on wax paper or parchment paper and then transferred onto the cookie. They are usually made with royal icing, caramel or chocolate and can be made ahead of time.
Tie-Dye Cookie Dough
The tie-dye method is a baked-in motif where the design of the cookie is made prior to baking.
Separate a batch of shortbread cookie dough into equal parts and, using gel food coloring, dye each one a different color. Break off smaller pieces in random alternating color and lay on parchment paper, slightly flattening the dough. Layer until all the dough is used and then roll and shape into a log. Chill the dough until firm, cut into recommended thickness slices and bake.
For an added effect, dust the cookie surface with edible metallic powders.
Wet-on-Wet Technique
This is a technique of decorating with royal icing where a design is piped onto the wet surface of a flooded cookie. The added icing sinks into the background icing, leveling on the surface for a flat cookie. Designs can range from simple polka dots or stripes to very elaborate filigrees. As with all techniques, starting simple is best and practicing makes perfect.
We hope this inspired you to do some holiday baking with your family or friends.
Combine two or more of the techniques for elaborate cookies or keep it simple and chic with a carefully executed single technique approach.
Don’t forget to tag us in your posts: #excelblades. We’d love to see your creations.