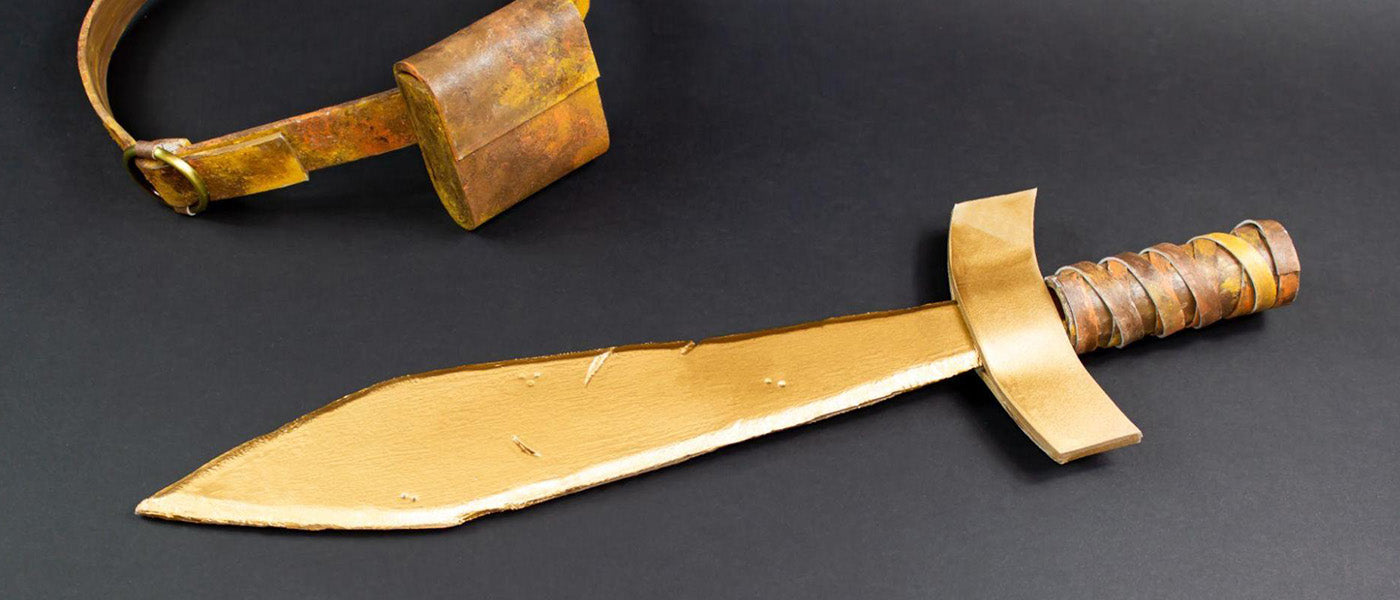
How to Make a Cosplay Sword
If you’re a cosplay beginner, don’t sweat! Start off easy and perfect your newfound craft with practice. This article is about a basic foam cosplay sword made using EVA foam, which can be purchased in most art supply stores.
Supplies:
- 3mm EVA Foam
- Craft Plastic Sheet — at least 1mm in thickness, small amount needed to sturdy the foam
- Paper towel roll (optional)
- Cutting Mat — you may want to go for the larger size, like our 24”x36” self-healing mat
- Craft Knife
- Snap Blade Utility Knife
- Ruler
- Scissors
- Glue
- Paint
- Water-based sealer for hobby and crafts
- Paint Brushes
- Tape (optional)
Prep:
Set up your workspace. Have all your materials and tools ready and protect your tabletop by working on a cutting mat — especially when cutting.
Step One:
Determine the length of the sword you’ll be making for your cosplay costume. First, rough cut two pieces of foam for the blade part of the sword. Pieces should be longer and wider than the design calls for. Use more layers of foam if your cosplay sword calls for it.

To reinforce the foam, glue a narrow strip of plastic in between the two pieces of foam. We used a strip of plastic purchased at the art store. This will help to stabilize the foam for the blade.
Cover the entire surface of the foam with glue to ensure that the two pieces of EVA foam are glued securely throughout. Let this dry. Follow the instructions on your glue for drying duration. You may have to test this out first on smaller scraps to ensure you get the proper adhesion and hold.

Step Two:
Draw the outline of your sword blade with a pencil.
Tool Tip: Use a ruler to draw all the straight parts and press the pencil into the foam. This will create a groove in the foam to use as a guideline when cutting.
Cut the blade shape out from the foam using a snap blade utility knife or a craft knife and make sure the blades are fresh and sharp.
Visit Our Shop for All Replacement Blades
Step Three:
Bevel the edges of the blade. You can use a number of tools to do this, including a utility knife or an electric sanding tool. Don’t worry about this being perfect. You can even out the rough parts with sandpaper or a sandstick and hide the rest with coats of water-based sealant later.
We also added a few battle scuffs and nicks during this step to give the blade a battle-used look. We cut the scuffs with a utility blade, made the round holes with a burnishing tool by puncturing the foam and added the scratches with an awl.
We Have Many Tools Perfect for Cosplay — Check ’Em Out!
This is the fun part — add as many scuffs as you can think of battle stories for, perhaps, a gouge made by a dragon tooth?
Step Four:
Seal the foam. Use a water-based sealer and cover the entire surface of the foam blade several times until all surfaces are smooth. Let dry between coats, sand out any imperfections as needed and add extra layers of sealer to smooth them out. Then, paint.
Step Five:
Repeat steps one through four to create the cross-guard, hilt and pommel. Use more layers of foam to create a thicker block and use the plastic to stabilize if necessary. Not all parts need this extra material.

Step Six (The Grip):
We used a cardboard core from shipping labels for the sword grip. It’s a bit over 1” in diameter, which is perfect. You can use paper towel cores by cutting them down the center and layering a few of them so it’s more solid. Other materials that you can use for the grip’s core are a wooden dowel or a 1” PVC pipe.
Once you have the core for the grip, you’ll need to cover it. Use 1mm foam cut to size and then glued. Cover the entire surface area of the core with a thin, even layer of glue so that the foam adheres securely. Let it dry.
Paint the foam surface with a seal and then acrylic paint in your choice of color — like metallic silver or gold. We chose to paint ours in faux leather to match the faux leather cord we’ll be wrapping the handle in.
To wrap the grip, make a faux leather cord. You’ll need the 1mm thickness foam for this part. Cut long strips about ¼” wide. We used scissors for this step. The sharp 8” blades allow for a smooth, continuous cut of the EVA material.
For an alternative grip design, cut the pre-painted strip into narrow strips, about 1/8”, and wrap in a neat spiral around the cardboard grip. Glue as you wrap to keep the faux leather foam in place.
Need the Right Scissors for the Right Project? Check Out Our Shop!
To recreate the look of distressed leather, we used three colors of paint — brown, burnt orange and mustard yellow. First, we applied a layer of brown and then dabbed the burnt orange and mustard yellow to blend. To keep our fingers clean, we used a burnisher to hold the strips in place. Use a water-based sealer to finish the faux leather cord.
Once all the components are painted, sealed and dry, wrap the grip of the handle with the faux leather cording. Start on one end and work your way out on the diagonal wrapping of the faux leather strip, like a serpentine. Wrap a second piece in the opposite direction so that the strips criss-cross each other. Glue in place.
Check out our other articles, like How to Make Cosplay Armor. There’s a few good tips for beginners there, too!
Have fun!
You May Also Watch: Make your own Cosplay Wings - Excel Blades® DIY Tutorial
