


How to Make Your Own Stamps
We love stamps! They’re a lovely way to personalize envelopes, Christmas cards, creating your own wrapping paper or decorations. The uses are endless.
There are a few things that can be used to make stamps. Some of them you probably already have around the house:
- Erasers
- Sponges or sponge sheets
- Potatoes
- Rubber carving blocks
- Craft foam sheets
Erasers are great because they’re soft enough to easily cut, and have a dense structure that allows the ink to transfer evenly.
Sponges, on the other hand, are softer and the shapes might be a bit more challenging to cut neatly. And because they are porous, the texture of the ink of paint transfer will be uneven and may be blurry around the edges. Sponge stamps are better used with paint.
Potatoes are tried and true for stamp making, but the stamps don’t last long as the potato breaks down and decomposes, making these stamps very temporary.
If none of the above mediums will do, there are factory-made rubber carving blocks available in many sizes at your local craft store or online. These are sometimes called rubber pads or printing blocks.
Check Out All Our Stamp Carving Tools
Stamps created using erasers and rubber carving blocks are very similar as the surface texture and material density are almost identical. The plus side of using the carving blocks is the size. Some are available in sizes up to 12”x18”. This means your stamp design doesn’t have to be limited to the size of an eraser.

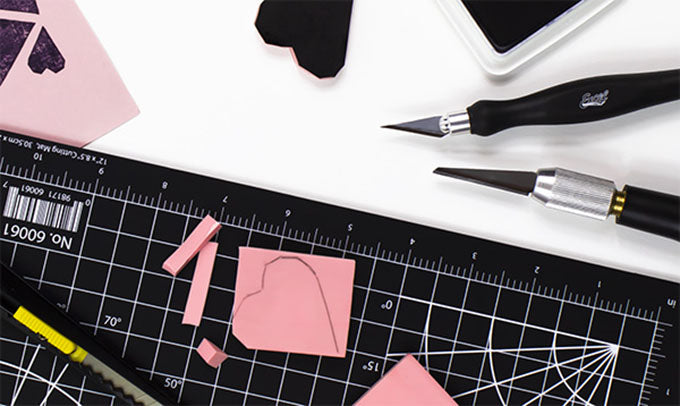
Depending on how intricate you want your stamps to be, you will need a few tools:
- Cutting mat — The size of the cutting mat will also depend on the size of your project. Having a cutting mat for your projects is a good idea because it helps to protect your permanent surfaces from damage.
- A precision knife, carving knife or a snap-blade knife, depending on your skill and comfort level
- Pencil
- Carving blocks or erasers
- Ink pads
Check Out the Large Assortment of Cutting Mats!
Other alternative supplies you may need:
- Stamp carving tools — gouges or chisels
- Acrylic craft paint and brush
- Sponge or sponge pad
- Craft foam sheets
- Potatoes
- Craft Scissors
- Cardboard
- Glue
- Cookie cutters
We’ll start with the easier stamp made from either an eraser or the carving block, “shape stamps” — which, as the name describes, is a stamp in the shape of something. It can be a simple heart or a star or something very complex like a castle or unicorn. These are made by drawing the outline of the desired shape and trimming away the excess material, leaving only that shape on the surface.
Set up your workspace. Then, using a pencil, outline the shape on the surface of the block or eraser. It’s okay to adjust your pencil lines as needed. Once happy with the outline, using your preferred craft knife, cut away on the outside of the pencil line until your shape is revealed. You now have a stamp!
To create a stamp similar to this using a potato, first cut the potato into ½” thick slices. Next, using a cookie cutter, cut the shape out. Using acrylic craft paint, apply a thin layer with a craft brush to one side. Test on a disposable surface before stamping your main project.
Cutting out a shape from a sponge pad or a compressed sponge using scissors is easier and more precise than cutting shapes out of a kitchen sponge. Whichever one you choose for your stamp, use a marker to draw the shape on the surface.
To keep your hands paint-free and messes at bay, glue the sponge stamp to a piece of cardboard folded into a triangle.
For stamping, add a small amount of acrylic craft paint on a paper plate. Dab the sponge stamp in the paint a few times so that the whole surface is evenly coated. Blot excess paint onto a flat paper towel.
Craft foam sheets are also a good way to make stamps. Using a pencil, outline the shape desired and cut out with a pair of scissors. Glue onto a piece of cardboard, folded into a triangle to keep paint away from fingers.

Now that we have the basic shape stamps covered, we’ll move on to linocut stamps. Short for linoleum cut stamps, this is a printmaking technique adapted from older woodcutting techniques.
Using a pencil, draw the design on the surface of the carving block. Then, using a small v-shape carving gouge, remove the material. For fine detail, precut the lines with a craft knife with a steel blade and then remove the excess using a carving gouge.

Despite their name, when using gouges, the trick is to skim the material off the surface, not gouge it off. Remove little by little to refine the design. There is some learning curve and practicing is key.

Another thing to remember is that when creating stamps, the resulting stamped image will be the mirror version. Keep this in mind, especially when carving letters or names. You can easily mirror your initial sketches using software like Photoshop or SketchUp. Or if you prefer to stay away from computers, draw your design in soft pencil on tracing paper, flip over and transfer to the carving block using the pencil transfer method.
As you get comfortable with the tools, try bigger and more complicated designs. And, as always, have fun!