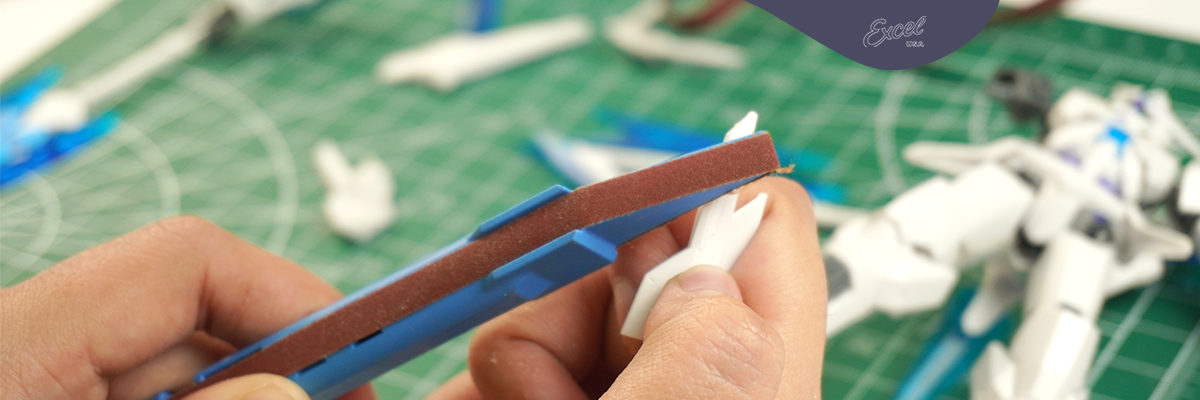
How to Sand Small Crevices: Pro Techniques for Tight Spaces
How to Sand Small Crevices: Pro Techniques for Tight Spaces
Whether you're a woodworker refining intricate trim, a model maker perfecting a miniature landscape, or a DIYer restoring furniture, sanding small crevices can be a serious challenge. These hard-to-reach spaces require a different set of tools, techniques, and patience than open, flat surfaces. In this guide, we’ll break down exactly how to sand small crevices—manually or with precision tools—to get flawless, detailed results.
Why Sanding Small Crevices Is Important
Sanding is the key to a clean, finished look. But neglecting small crevices can result in:
- Uneven paint or stain absorption
- Rough textures that spoil aesthetics
- Dust and debris buildup
- Poor adhesion of finishes
This is why detail sanding matters—especially for woodworkers, model makers, and luthiers.
Top Tools for Sanding Tight Spaces
1. Sanding Sticks
Sanding sticks are essential for maneuvering in tight spots. Excel Blades offers precision sanding sticks that come with replaceable belts, making them long-lasting and effective.
Best For: Model kits, wood carvings, trim detailing
Pro Tip: Use a fine grit (180–320) for smooth finish work, and coarse grit (80–120) for material removal.
2. Needle Files
Needle files provide pinpoint control for sanding tight grooves or notches. Excel's needle file sets are perfect for fine detail work in wood, plastic, or soft metal.
3. DIY Sanding Tools
Can’t find the right shape? Make your own:
- Wrap sandpaper around a toothpick, chopstick, or popsicle stick
- Use old emery boards (nail files) for delicate work
- Fold sandpaper into tight triangles to press into crevices

Manual vs. Power Sanding: When to Use Each
|
Task |
Manual Sanding |
Power Tools |
|
Curved trim |
✔️ |
❌ |
|
Intricate model work |
✔️ |
❌ |
|
Repetitive sanding |
❌ |
✔️ |
|
Flat small spaces |
✔️ |
✔️ |
Power tools, such as rotary tools with sanding attachments, can help—but always mask nearby areas to avoid over-sanding. Excel Blades’ rotary accessories are compatible with most hobby-grade tools.
Step-by-Step: How to Sand Small Crevices
Step 1: Clean the Surface
Before sanding, remove dust, dirt, or paint using a brush or compressed air. Any leftover grime can scratch the surface.
Step 2: Choose Your Grit
- Coarse (60–100 grit): Removes large imperfections
- Medium (120–150 grit): Smooths the surface
- Fine (180–240 grit): Preps for paint or finish
- Extra fine (320+ grit): Polishes without scuffing
Check out our grit selection guide to match the right abrasives to your project.
WATCH: Excel Blades Sanding Sticks on Activa Products Li-Qua-Che
Step 3: Shape Your Tool
If you're working in:
- Rounded crevices: Wrap sandpaper around a dowel or pen
- Angular corners: Fold sandpaper into triangles or squares
- Deep holes: Use flexible sanding sticks or needle files
Step 4: Sand Slowly & Consistently
Don’t rush. Move your tool back and forth in controlled strokes. Use a light touch—especially with power tools—to prevent gouging or rounding corners.
Common Mistakes to Avoid
- Over-sanding: Causes uneven grooves or damage
- Wrong grit choice: Too coarse can leave scratches
- Skipping clean-up: Dust can trap under finishes
- Improper tool angle: Leads to uneven abrasion
Advanced Tips for Clean Finishes
1. Use a Headlamp or Task Light
Small crevices can hide shadows. A focused light source helps you spot imperfections.
2. Compressed Air for Dust Removal
After sanding, blow out debris from tight spaces to avoid finish contamination.
3. Foam-Backed Abrasives
Flexible yet effective, these pads mold into tight areas and hold grit evenly.

Project Ideas That Require Detail Sanding
- Model Dioramas
- Custom Cabinetry & Trim Work
- Miniature Railway Scenery
- Electric Guitar Building
- Restoring Antique Picture Frames
If you're building any of the above, you’ll need more than just elbow grease—you need precision sanding tools and needle files designed for accuracy and comfort.
Recommended Excel Blades Products
|
Tool |
Best Use |
|
Detail Sanding Stick Set |
Tight corners and model work |
|
Needle File Set |
Fine wood or plastic details |
|
Precision Rotary Tool Kit |
Power sanding small areas |
|
Craft Knife + Sandpaper |
Trimming burrs or sanding guides |
Conclusion: Sand Like a Pro, Even in the Tightest Spaces
Sanding small crevices isn’t impossible—it just requires the right tools, techniques, and a little creativity. With tools like Excel Blades’ sanding sticks, needle files, and DIY abrasives, even the most intricate corners can be smoothed to perfection.
Ready to elevate your detail sanding game? Explore Excel Blades’ full selection of sanding tools and master every edge, corner, and groove with confidence.
You May Also Watch: Sculpting Air Dry Clay with Burnishing Set