How to Change a Coping Saw Blade — Your Step-by-Step Guide
A coping saw is used to cut precise and intricate shapes in woodwork, including carpentry, but can also be used to cut aluminum and other materials.
For the curious mind, we found a very short article about the history of coping saws — and if interested in this bit of trivia, we recommend the quick read. Also, check out our guide to using a coping saw.
Generally, all coping saws are similar and consist of the following parts:
- C-frame or U-frame — They are referred to as such due to the fact that the frame resembles either letter. Frames are slightly flexible so that the blade can be attached.
- Thin Blade — Usually made of steel or alloys, these blades are thin, lightweight and sharp. Due to the thinness of the blade, it’s easy to change direction of the saw, allowing for intricate cuts. As with everything, skill improves with practice.
- Handle — The handle is cylindrical and ergonomic and is usually made of wood or plastic.
- Arms — Located at each end of the frame, this mechanism allows for holding and rotating the blades.

Each manufacturer has a version of the mechanisms that hold the blade in place. Generally, they all “pull” the blade apart so that it is taut. On some models, the thumbscrews will tighten or loosen the blade and on other versions, the thumbscrews will help to rotate the blade in the direction needed.
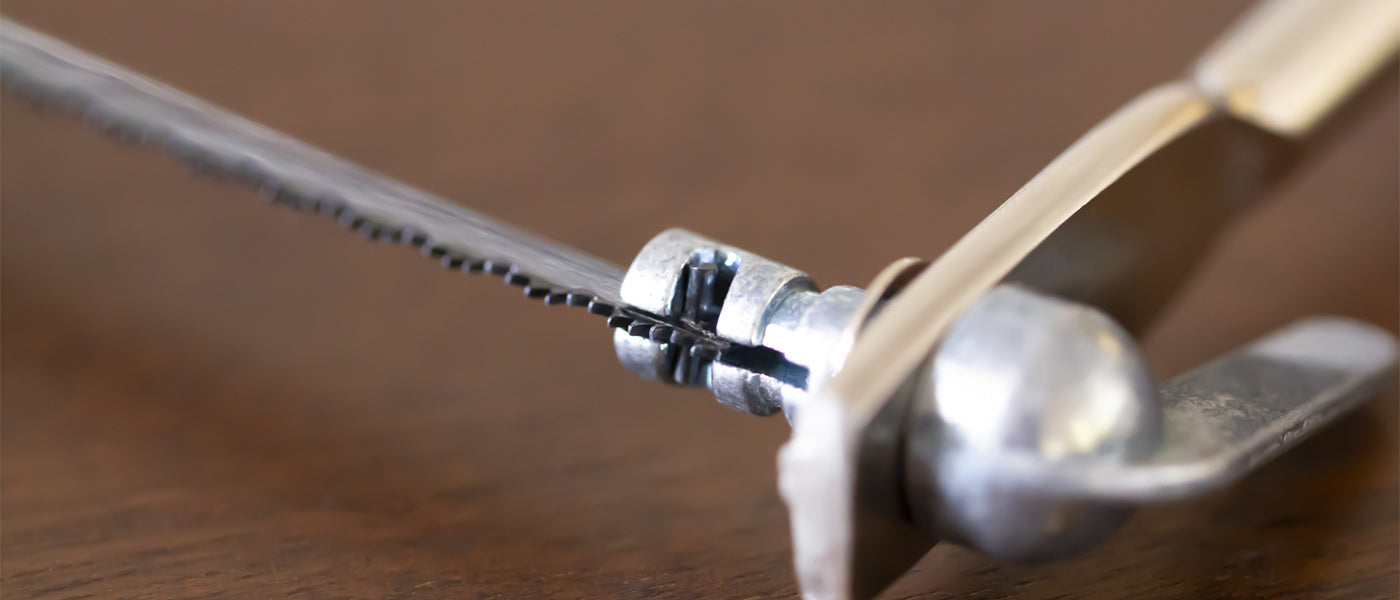
Our coping saw pulls the blade to keep it stretched and straight with the use of notched blade holder pins or holders.

Coping saw blades are labeled in TPI, which means teeth per inch. This means exactly that —the number or teeth in an inch on the saw blade edge.
The number of teeth on a saw blade will dictate the roughness of the cut and the speed at which the cut is made. More teeth mean a smooth slower cut, whereas less teeth on a blade means the cut will be rough and may need additional smoothing. This is true for all types of saw blades, not just the ones used on coping saws.
An added benefit of the thinness of the coping saw blade means that it can be inserted through a drilled hole to make interior cuts in wood. It also allows for flexibility and quick change of direction in the cuts, so cutting circles or scalloped lines is possible. However, this takes skill and practice.
To replace the blade on Excel’s coping saw, first remove the old one by taking apart the saw. Hold the arm near the handle in place and turn the handle left-wise to loosen. Remove the handle and then carefully remove the old blade.

Take a fresh blade and insert one end in the top arm first — that’s the one farther away from the handle. Check to make sure the saw blade teeth are facing in the right direction. Blades have small holding pins at each end. These should be inserted into the notches of the blade holders as in the photo above and below. Teeth should be pointed towards the handle.
Shop Coping Saw Replacement Blades
The holding pins help to keep the blade in securely by being inserted into angled notches in the blade holders.

Insert the other end of the saw blade into the notch of the bottom arm, closest to the handle, by compressing the frame.
Hold in place and tighten by turning the handle towards the right. Position the blade as needed and check that the blade is not twisted in different directions.