Skip to content
Due to the Canada Post strike, USPS is not accepting any packages bound for Canada – all CA orders will be sent via UPS
Due to the Canada Post strike, all CA orders will be sent via UPS

Country

Please select the option that best suits you
Hobbyist
OEM / Custom Solutions
Wholesale
DIY Room Decor Ideas

DIY Room Decor Ideas

Refreshing a room with a few DIY projects can be a fun way to bring your personal style and creativity to your surroundings. Below are a few ideas to inspire you and get you started (and that won’t break the bank).  

Coasters

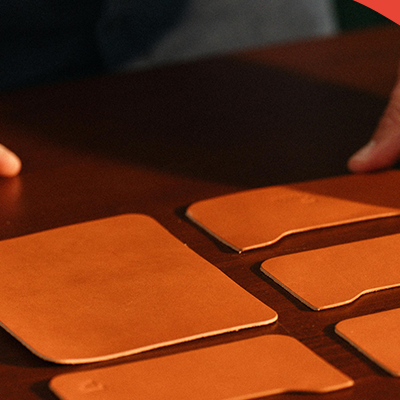
These days a coaster can be a statement piece on its own and not just some trinket from a souvenir store. Coasters can be crocheted in a multitude of patterns and colors that coordinate with your living space and mirror your personal flair. They can even be made from felt or fabric, or they can be made from polymer clay. 

For this DIY you’ll need to gather the following supplies:

  • Polymer clay in your choice of colors
  • Self-healing cutting mat - get a large one so you have plenty of workspace surface
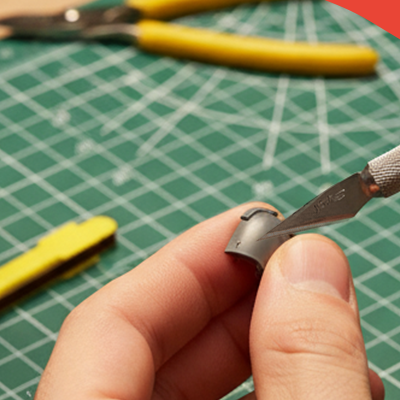
  • Hobby knife with a new blade
  • Cardstock paper - this is for the stencil
  • Wax paper
  • Sealer & finishing glue and applicator brush
  • Rolling pin or clay roller
  • Sanding stick with a fine grit sanding belt
  • Cork sheet - this will be used for backing, pick one that’s thin, approx 1/16”
  • Adhesive - pick one that works well with your polymer clay

Find the Right Hobby Knife for Your Decor Craft

Coasters

Sketch a few ideas for your coaster and draw to scale to make sure that your favorite coffee mug will fit perfectly on it. This could be simple with an ornate design or a unique shape in your favorite color. Refine your design, then make a stencil in cardstock for your overall shape. 

Making Coasters

A few polymer clay techniques to consider:

  • Stripes: Cut narrow strips of clay in several colors, then arrange in a pattern.
  • Marbling: Gently mix two or more colors of clay so that they blend but do not fully mix. The more swirls and variations, the better. 
  • Terrazzo: This is bits of contrasting colors on a solid background.

Work the polymer clay so that it is soft, then roll it into a sheet on wax paper so that the clay doesn’t stick to the cutting mat. If you’re making a surface design, this is the step to do so. Make sure that your overall finished slab is no thinner than 1/8”. A slab is a term used for a sheet of decorated polymer clay.

Lay the stencil on the slab and carefully cut it out using the craft knife. Gently pat down and even out any imperfections. Bake so that it is solid and follow the baking instructions on the packaging of your polymer clay. 

Once cooled, use a sealer to finish the surface of the coaster. Let dry as per instructions on the packaging. In the meantime, trace the stencil onto the cork backing and cut it out. Glue the cork base to the bottom of your coaster. 

Polka Dot Wall Art

Polka Dot Wall Art

This one is a favorite of ours. It’s simple enough and you can easily change it up or add new colors. 

The supplies you’ll need to complete this DIY room decor project:

  • Self-stick removable vinyl sheets in your choice of colors
  • Large cutting mat 
  • Craft scissors or a craft knife - whichever one is your preference
  • Circle cutter and ruler - to either draw or draw and cut out the circles

Browse Our Craft Scissors Selection

Circle cutter and ruler

On the wrong side of the vinyl sheet, use the post and pencil to draw the circles in your choice of diameter. Then either switch to the swivel blade post to cut out or use a craft knife or scissor, whatever is easiest for you. 

Cut out enough circles to cover the wall area you are looking to cover. The polka-dots should look intentional and not too scarce for the best effect. The reusable quality of the self-stick vinyl will allow you to reposition the dots as needed. 

Have fun with this! 

Artificial Flower Arrangement

Artificial Flower Arrangements

These last longer than real flowers so you can change them out seasonally instead of every few days. This project is not as hard as it may seem and because you’re working with silk flowers, you can fix your way out of minor mistakes. 

For this project you’ll need the following supplies:

  • Silk flowers in your favorite colors and varieties 
  • A vessel like a mason jar or a vase
  • Floral tape
  • Wire cutter for cutting and trimming silk flowers
  • Scissors

We prefer to always work on a cutting mat that protects our table surfaces, and cutting mats can be easily cleaned too. 

Start by making a grid over the opening of your vessel using floral tape. Be sure to stretch the tape a bit so that it becomes tacky and sticks to itself and the surface of the vase or jar. 

Then, using the wire cutter, trim the silk flower stems down to a size that’s appropriate for the vessel size. Start by arranging the greenery at the base and circumference of the vase. Then add the largest flowers, followed by the smaller flowers in between. Lastly, add greenery as fill in between the blossoms so that there are no gaps. 

For in-depth directions read our full article on how to make artificial flower arrangements

supplies

Decorative Pillows 

In a recent post, we wrote about sprucing up a room with DIY decorative pillow covers and hand-quilting techniques. Check out both articles for more ideas! 

DIY Rubber Stamp Art

DIY Rubber Stamp Art

Create one-of-a-kind wall art in a few steps. 

Gather the following supplies to begin:

  • Poster board in your choice of color
  • Frame
  • Lino stamp rubber
  • Ink pad in your choice of color
  • Pencil
  • Carving gouges and handle 
  • Craft knife
  • Cutting mat

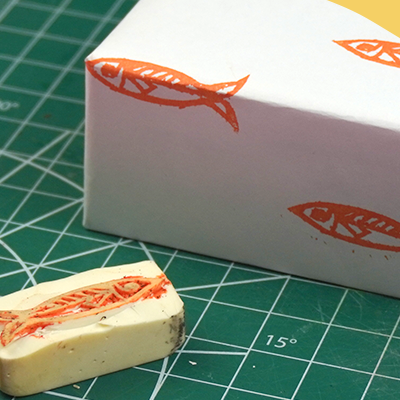
On a piece of lino rubber, approximately 2.5x1.5”, sketch a motif in repeat that’s not overly complex in pencil. Using the carving gauges, remove the material you don’t want as part of the artwork. 

With the craft knife, cut the poster board down to size so that it fits into the frame and mark the corners of the allowance that will be covered by the frame very lightly in pencil. You will work within those lines. 

Rubber Stamp

Once happy with the design, test it on a sheet of paper to make sure you like the way it looks and there are no unwanted marks. Adjust as needed. 

Starting in one corner of the poster board, start stamping the motif horizontally in a straight line, then move down and repeat until the whole poster board is covered. Let the ink fully dry. 

Then frame. Hang up. Admire! 

Previous article Unleashing Creativity: Your Ultimate Guide to DIY Cosplay
Next article Impress Dad With These Father's Day Card Ideas

Compare products

{"one"=>"Select 2 or 3 items to compare", "other"=>"{{ count }} of 3 items selected"}

Select first item to compare

Select second item to compare

Select third item to compare

Compare