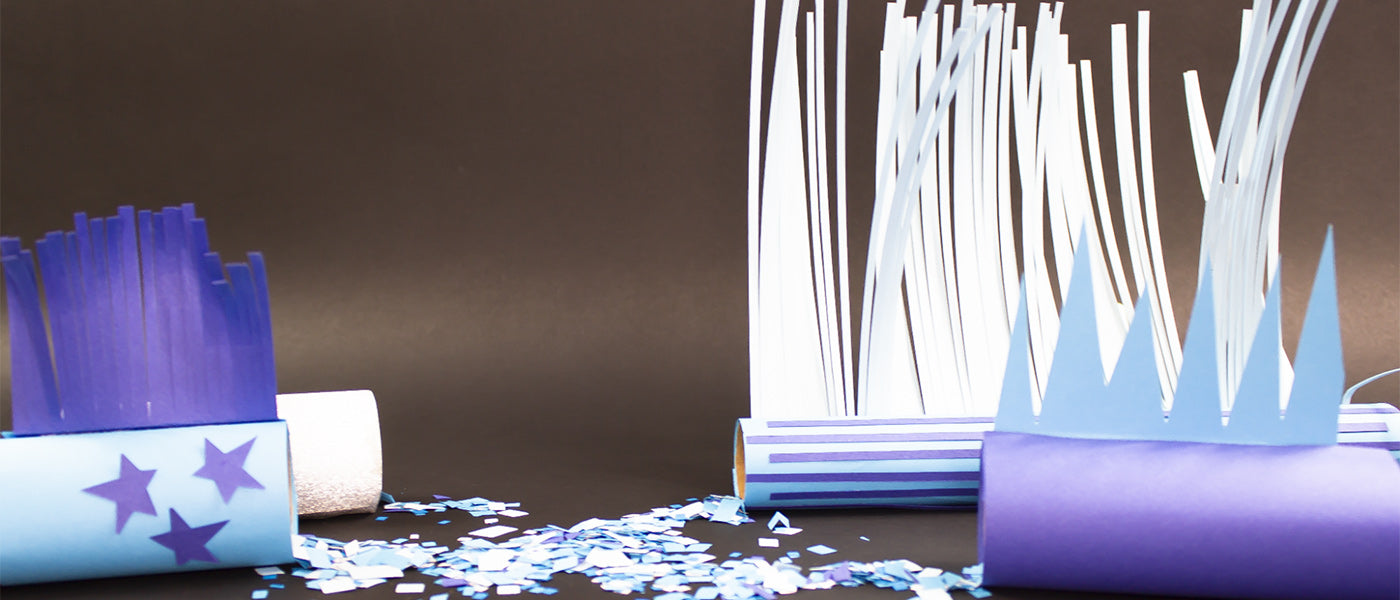
DIY Confetti Poppers for the 4th of July
Last year, we showed you how to create DIY confetti poppers made from a TP roll core. This year, we’re going better and bigger. We added a bit of pizzazz and flair to this DIY project, so you’ll want to add this blog to your favorites and use this idea for all upcoming celebrations. Anyone got a birthday coming up?
Gather your supplies because you’ll need a few things:
- One cardboard wrapping paper core or two cardboard paper towel cores
- Paper in your choice of colors. We keep all our paper scraps so we’re bringing those out as well
- Scissors
- Craft Knife
- Ruler (Tip: check out our Alumikit ruler and craft knife combo to snag both tools at once!)
- Glue
- Balloons
- Tape
- Cutting mat
Prep:
Gather all the necessary materials and set up your workspace. We like a clean, well-lit area and we always work on a cutting mat as this protects our working space and table surface. We offer an assortment of cutting mats in multiple sizes that you can use again and again for years to come, so if you don’t have one yet, grab your preferred size and any other tools you need before you begin.


Step One:
Measure and cut the cardboard core so that you have two equal length pieces. Then, cut one lengthwise. We used scissors for this step. If you are using paper towel cores, set one aside and cut the other as in the photo.

Step Two:
Tie the balloon end in a knot and cut the top off. Wrap it around the one end of the solid cardboard core. Then, tape down so it is secure. The balloon should not be able to move off the cardboard. This is the confetti firing mechanism. By pulling the balloon back and then letting go, the confetti is catapulted into the air.

Step Three:
Slide the cut core over the solid core so that the taped balloon is now in between the two cardboard cylinders. Tape or glue in place so that nothing slides or moves. There will be a gap in the top layer cardboard. This will be covered up in the next steps, so no worries.

Step Four:
Use a pencil to mark the width and length of the paper you will need to wrap the cylinder. Add about a half an inch for the overlap. Square using a ruler and the grid on your cutting mat and then cut using the craft knife. Save the scraps for later decorations.
Cover the cardboard with one solid sheet of craft paper in your choice of color. Plan for an overlap at the seam so that there is no visible cardboard or tape peeking from underneath. Glue down for a clean look. Leave about an inch unglued so that the fringe can be neatly glued under.

Step Five:
Decorate! First, the flair — and, in this case, we mean fringe! Cut a sheet of paper a half inch shorter than the length of the overall cylinder. Mark a half inch. This is the part that will be glued in. Use the grid on your cutting mat as guides. Using a ruler and a craft knife or scissors, cut the fringe. Narrow cuts are better when using craft paper and wider fringe can be made from color printer paper.
Glue the fringe in place under the cover craft paper and then glue closed. Let it dry. Add other decorative elements to the surface of the confetti popper.

Step Six:
The confetti! We’ve covered a few techniques for creating paper confetti before in our article about DIY Summer Crafts, but here’s a quick recap: Cut narrow strips of paper and then cut them again perpendicularly to create small, square-shaped confetti. Those scraps from earlier steps are perfect for this! And one additional positive aspect of paper confetti is that it’s degradable, unlike plastic confetti which can turn into a lingering mess.
Step Seven:
Load up the confetti and pop, pop! POP! Who says grown-ups can’t have fun?!
Did you make this project? Show us your crafty creations by tagging us @excelblades on social media, and let us know what you thought of any Excel Blades tools you used during the process. We’d love to hear your feedback!
Have a safe and happy Fourth of July!